Showing posts with label Dining Rooms. Show all posts

Glam Global Village Dining


I love this room.
I love the funky golden mirrors, the whimsical-yet-moody artwork, the intensity of the chairs
and that lighting, which pulls it all together.


dining room

It's spaces like this that remind us to be bold, yes?

til next time...

Wanted: Have you Seen These Plates?


I really, really want to re-create something like this in my home...


This is the rub:
I have no idea what the source is for this photo, nor where any of the plates came from-
do you?

I'm thinking is that perhaps this type of imagery could be made by back-mounting images to glass plates...
perhaps a new project is in the works :)

til next time..

A Lighting DIY: The New Chandelier


So having always loved these


and after seeing how Jen made hers


I decided to make one and use it as an interim chandelier in the dining room until 
something more like this is in the budget..


There are a few different tutorials kicking around for this one, 
but I ended up doing something a bit different.

Having never wired anything before, I wanted to be sure that this was not going to be a fire hazard!
(and thought that using a pre-made pendant light might just save a whole lot of time)
 so I bought one of these..


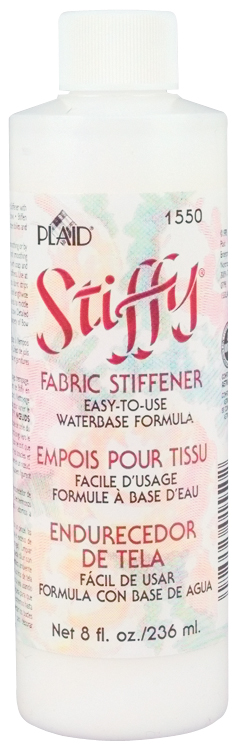
two bottles of fabric stiffener


and a heaps of white cotton yarn.


We had an exercise ball kicking around (I am not co-ordinated enough for one of these - truly :)


So it was off to the races.


TIP: Cover your work area in plastic before you start, and secure that plastic to the surface.
You will be glad you did. This is messy. SUPER messy.


removed the top piece from the shade..
this will give the finished product extra strength and keep the bulb in place. 


Marked a circle for the hole you need to leave for placing the electrical and bulbs inside later.
Keep it fairly high, and it won't be noticable.


This is where the plan changed a bit.
 I was about to take a picture of the yarn soaking in a tub full of stiffy,
but I stood there staring at all that white, and knew I really wanted something more natural and textural.

So.

Out of the cupboard came the twine!
Now I had to wrap the metal frame with twine ( to disguise it) before I could begin shaping the ball.


I soaked the twine thoroughly, wrapped it around the ball once, 
and tied it to the frame - leaving a few extra inches for hanging during drying.
Then it's just random wrapping until you get the effect you like.
It took me about an hour to get to this stage.


Next, I used a small brush to cover the entire thing with an additional coat of stiffy,
and hung it from a ladder to dry - 
the dogs were trying to figure out exactly what was going on in the craft room!

 I waited 24 hours, but should have waited longer.
It had hardened further by the time we hung it.
Gently push the ball in all around to loosen the ball from the twine, then deflate gently.
I had to squeeze both my hands inside to cut the ball up before removing -
 it was too big to fit through the opening I had left!


Using the pendant light meant simply removing the wire from the top plate and feeding it through, them replacing the top plate and installing.. that whole process took about 10 minutes!


Remember the dining room before?


Here it is with our new light:


The large scale is perfectly dramatic,
and the texture plays really well off the new chairs - still waiting for cushions :)


now the whole space is bathed in the most wonderful patterns, especially at night...


All in all, a fairly simple DIY - although I had my doubts that it would harden sufficiently, it did!
The best tip I can give use is to be really generous with the fabric stiffener.
I'm completely happy with the results- and the price - it was $40.00 in total.
When we do replace this with a chandelier, 
it will definitely find it's way into another room of the house.

Hope these projects inspire a few of you - 
if they do, please send me some pics of your creations so I can share them on the blog!

til next time..


Must-See: The DeCesare Design Group

One word - scale.
That's what I thought when I first saw these interiors.
After exploring the site further, I took another look.

The DeCesare Design Group consists of one principal Designer, Caroline Tyler DeCesare,
 several design, office, and studio assistants, and an installation team.

I know this because Carolyn DeCesare has placed professional bio's
 of each of these individuals on her site.
Rarely does anyone fully credit the team that makes it possible to create these stunning spaces,
and I think that graciousness extends into her design.

So we have two words now - scale and graciousness!

Now these kitchens.. 
We don't all have the space, but the style can be adapted on a smaller scale -

the serene space..


for those who love to cook and entertain, the energy is amped up with contrast and color:


I need those lights. Need.


I am a white cabinet kinda girl, but his one has me dreaming..


A sultry dining room - love the mix of finishes in here.


The mirror - oh!


That dining room really needs a splashy living room to join it, don't you think?
How about a Fortuny light, my all-time favourite.


Baths you'd want to spend time in..


and somewhere to take it all in..


See what I mean about scale?

off to work.. color for three teen bedrooms this afternoon..
hope you all are having as super a day as I am..

Wouldn't it be nice to be working here :) ?


tomorrow I will show you some of their office spaces - fantabulous!


til next time..


Projects and Parties


How was your weekend?

Ours was a blissful blur of family and friends..
Managed to take a few pics in between brunch and dinner on Sunday
to show you some of the bits I made this week.
So inspired by this palette right now...


I added glitter to some eggs we had decoupaged last Easter, a la Eddie Ross.
Love how they turned out, but let me just say,
If you plan to break out the spray adhesive spray adhesive and glitter at the same time
 be prepared to have a sparkly home :)


The ric rak trimmed linen napkins turned out really well, 
they were a lot of effort but now we have a huge set
 that will work whenever we have everyone over together, which we do quite a lot!

Fell in love with some napkins rings at Pier One inspired by vintage brooches, 
but at five dollars each, buying 34 wasn't going to happen!
Instead, I bought some silk flowers, separated the leaves, 
added a pearl to the centre of each petal (on fishing line) and strung them on some gold ribbon.

We got a similar feel for $3.00, 
and all the girls collected them later and wove them into their hair :)


D. brought home a few dozen roses
(he is such a sweetie)
and so they were all throughout the house - 
it smelled amazing!


Natasha enlisted her cousin to help her decorate cupcakes with sprinkles and peeps -
and since we had all gathered here, we celebrated her upcoming twelfth birthday as well.

Did I just say twelfth? One more year til there is a teenager living here :)
This has been a big year of change for Tash,
I am beginning to see the woman she will become and couldn't be more proud of her.


Had planned to take some pictures of the buffet we set up because there was massive amounts
 of delectable goodies (for dinner and dessert) but it was a bit mad!

Can show you pics of the new dining room curtains I sewed up..


Isn't that fabric to die for?
A major splurge, 
but this window is the first thing you see entering the room and it needed some love!
This room is next on the list to be finished.


The chairs got new cushions - I was going to custom make some but went to Wal-Mart 
(yes, you read that correctly - WALMART!!!)
to buy the pillow forms and found these - 
perfect size, durable cotton linen-look fabric, tufted, piped box cushions for $10 dollars each!! Score!
 Scouting out art for a gallery wall in the next couple of weeks 
but since we had cleared out the previous display, and needed something up here for Easter,
 I framed a really beautiful bit of silk that I fell in love with recently.
(couldn't leave the store without a metre, although I had no idea where it was going to end up!)
The frame came from the thrift store - 
bought it for the original figural pastel inside, which is going to be re-framed and hung somewhere...
 The frame was in good shape, so a lick of black paint and it works for now.

What would we ever do without black and white paint?!!


Speaking of white paint,
I've been reading about a fellow bloggers struggle to find the right white paint this week.
Since it is such a common struggle,
thinking that perhaps a post about how to get white right might be helpful.
I'll try to get it up this week :) 

Looking forward to hearing (and reading) about how all of you spent your weekend...