Pages

Showing posts with label Lighting. Show all posts

A Lighting DIY: The New Chandelier


So having always loved these


and after seeing how Jen made hers


I decided to make one and use it as an interim chandelier in the dining room until 
something more like this is in the budget..


There are a few different tutorials kicking around for this one, 
but I ended up doing something a bit different.

Having never wired anything before, I wanted to be sure that this was not going to be a fire hazard!
(and thought that using a pre-made pendant light might just save a whole lot of time)
 so I bought one of these..


two bottles of fabric stiffener
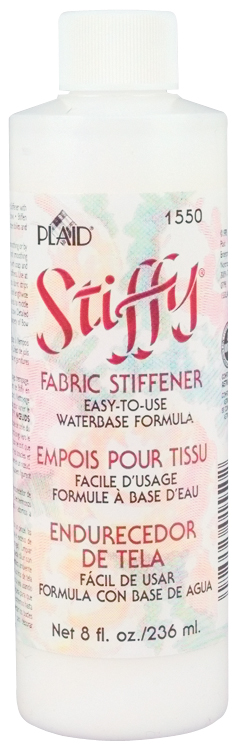


and a heaps of white cotton yarn.


We had an exercise ball kicking around (I am not co-ordinated enough for one of these - truly :)


So it was off to the races.


TIP: Cover your work area in plastic before you start, and secure that plastic to the surface.
You will be glad you did. This is messy. SUPER messy.


removed the top piece from the shade..
this will give the finished product extra strength and keep the bulb in place. 


Marked a circle for the hole you need to leave for placing the electrical and bulbs inside later.
Keep it fairly high, and it won't be noticable.


This is where the plan changed a bit.
 I was about to take a picture of the yarn soaking in a tub full of stiffy,
but I stood there staring at all that white, and knew I really wanted something more natural and textural.

So.

Out of the cupboard came the twine!
Now I had to wrap the metal frame with twine ( to disguise it) before I could begin shaping the ball.


I soaked the twine thoroughly, wrapped it around the ball once, 
and tied it to the frame - leaving a few extra inches for hanging during drying.
Then it's just random wrapping until you get the effect you like.
It took me about an hour to get to this stage.


Next, I used a small brush to cover the entire thing with an additional coat of stiffy,
and hung it from a ladder to dry - 
the dogs were trying to figure out exactly what was going on in the craft room!

 I waited 24 hours, but should have waited longer.
It had hardened further by the time we hung it.
Gently push the ball in all around to loosen the ball from the twine, then deflate gently.
I had to squeeze both my hands inside to cut the ball up before removing -
 it was too big to fit through the opening I had left!


Using the pendant light meant simply removing the wire from the top plate and feeding it through, them replacing the top plate and installing.. that whole process took about 10 minutes!


Remember the dining room before?


Here it is with our new light:


The large scale is perfectly dramatic,
and the texture plays really well off the new chairs - still waiting for cushions :)


now the whole space is bathed in the most wonderful patterns, especially at night...


All in all, a fairly simple DIY - although I had my doubts that it would harden sufficiently, it did!
The best tip I can give use is to be really generous with the fabric stiffener.
I'm completely happy with the results- and the price - it was $40.00 in total.
When we do replace this with a chandelier, 
it will definitely find it's way into another room of the house.

Hope these projects inspire a few of you - 
if they do, please send me some pics of your creations so I can share them on the blog!

til next time..


Woodland Chandelier - Sculptural Lighting

As a bit of a tree enthusiast,
I love objects made from branches and stumps
where the tree still retains some of its identity.

Twig chandeliers and the branch versions of late speak to me in ways no crystal configuration ever could.

So when I got this in my inbox yesterday, I swooned.


delicate, sculptural, just the right amount of light..
Perfect, really.

Jessica Bodner makes heaps of beautiful lighting...


I have long admired her previous branch version - though it is too bejeweled for me..


the craftsmanship is incredible - look at this detail!


Right then, back to reality - off to inject some color into an office - have a lovely day..

til next time..


Yea or Nay: Exposed Filament Bulbs


They've become the new norm for hip eateries, bars and shops..


and they are casting their gorgeous light in more and more homes..


Vintage bulbs are beautiful and their glow flattering,
the bulb itself become the focal point, no need of a bulky fixture to diffuse or disguise these lovelies.


So what's the downside?
They are huge energy consumers.
 I find the hum (yes, there is a hum, I swear it) of CFL bulbs really grating,
and of course the colour of the light is terrible,
but I have grudgingly placed them in many of the lights through our home.

These vintage bulbs with their wonderful soft light, akin to candlelight, beckon temptingly :)
maybe just one...


or two..


Are you tempted?

I am placing some cage lighting in a few spots in our home - 
I'll post pics of the hall light re-do shortly - 
and these may find their way to our doorstep.

til next time..

The Dorm Room: Best DIY Ideas


Did you know that the back to school market is a $68 billion dollars industry?

Dorm supplies make up at least $4 billion dollars of this total.

Thats a lot of flokati rugs :)

If you're decorating one of these tiny spaces, you may not want to spend a fortune,
because chances are everything in it will have to be burned by the end of the year!
But who wants to live in the fuschia and black nightmare I keep seeing marketed toward college students?


 I thought I'd go looking for some clever, original diy ideas for student spaces.


First thing, I got distracted by the dorm of Maximilian.
This is not ultra affordable, but damn it's gorgeous!!
Attending Drew University in Madison, New Jersey,
he interns for Charlotte Moss and has spent summers working with David Easton.

The ultra-preppy space he created is completely unexpected.


Walls are painted Ralph Lauren's Tapestry Green,
then given the gallery treatment.
Oriental carpets layer the floor,
a black watch skirted console functions as a perch for a tv,
 while a tray table tucked in alongside offers a tiny bar space.

Ties offer up a witty take on wall decor, while solving the storage issue.
A vintage dresser is styled in a manner that would not be out of place in an english manor -
including matching lamps with chinoiserie paper shades, an orchid, crystal and books 
layered under a gold rimmed mirror and classic art prints.


W O W.

He has his own design business, and I'm quite sure it will be a smashing success.


Okay, back on track :)

If you are more indie than prep,
and want something a bit less traditional,
there are heaps of really easy ideas out there that go beyond new bedding..


Walls of sticky notes paint samples, photos, postcards...
A mishmash of posters becomes an art installation when grouped around a typography bit.


The easiest way to upgrade a standard headboard?
Drape a blanket over it!

No headboard?
Make one out of photo's spray glued to foam board, 
or just cut one from whiteboard and call it a day.

A screen doesn't have to be attached to the wall,
and these work double duty as headboard and storage,
or headboard and art.


Dress up a paper lantern with coffee filters or crepe paper...
re-use some favourite old tins,
or play with string lights.


1 2 3 4 5 6 7 8 9 10 11 12 13 14


Almost makes you want to hit the books again, doesn't it?


Hope your'e all enjoying the quiet this week has brought :)

I know next week we'll be missing the darlings, but for now, basking in a bit of silence.... xo


Russian Talent

I have had the site for Andrey Zharnitskiy bookmarked for a while..
Ikept intending to find out more about them - my Russian is a little rusty!

But we all want pics, not words, don't we?!!

lighting love


 looks like an art installation, doesn't it? The illuminated headboard must be gorgeous at night..


Under-bed lighting - love it or hate it? 
The grouping of small pendants over the dressing table is wonderful - detail below..


I am desperate to bring a plant into this kitchen :)
but do you see that lighting?!!


This belongs over my dining room table :)


fab built-in's


details, details

the lattice is fantastic, right? 
not sure if those are fake fur covered walls, but I think I'd skip that part..
bad memories of the late seventies (yes, I was alive then, but very young. very.)


the other side of that bedroom from lighting..


can you say lounge?


beautiful handles


This might steal the show, but what fun..


a smile every time you open it..


love this modern mural..


I'll leave you with a selection of drool-worthy floors..


Hope you enjoyed..

til next time..