Pages

Showing posts with label diy. Show all posts

A Wreath Made From POT SCRUBBERS!!


I was not expecting this chic result when I read "Pot Scrubber Wreath".
You weren't either, were you?


Really, that is the coolest thing I have seen in a while.
Thank you, Virginie from Chatelaine.
Watch the DIY video here.


til next time..

A Lighting DIY: The New Chandelier


So having always loved these


and after seeing how Jen made hers


I decided to make one and use it as an interim chandelier in the dining room until 
something more like this is in the budget..


There are a few different tutorials kicking around for this one, 
but I ended up doing something a bit different.

Having never wired anything before, I wanted to be sure that this was not going to be a fire hazard!
(and thought that using a pre-made pendant light might just save a whole lot of time)
 so I bought one of these..


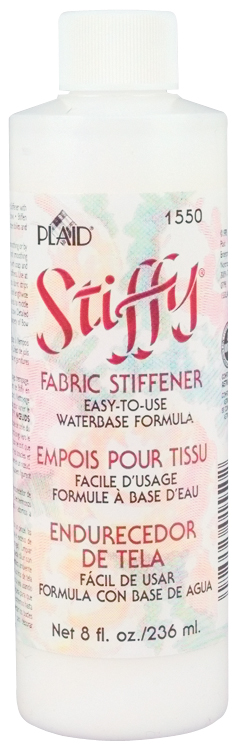
two bottles of fabric stiffener


and a heaps of white cotton yarn.


We had an exercise ball kicking around (I am not co-ordinated enough for one of these - truly :)


So it was off to the races.


TIP: Cover your work area in plastic before you start, and secure that plastic to the surface.
You will be glad you did. This is messy. SUPER messy.


removed the top piece from the shade..
this will give the finished product extra strength and keep the bulb in place. 


Marked a circle for the hole you need to leave for placing the electrical and bulbs inside later.
Keep it fairly high, and it won't be noticable.


This is where the plan changed a bit.
 I was about to take a picture of the yarn soaking in a tub full of stiffy,
but I stood there staring at all that white, and knew I really wanted something more natural and textural.

So.

Out of the cupboard came the twine!
Now I had to wrap the metal frame with twine ( to disguise it) before I could begin shaping the ball.


I soaked the twine thoroughly, wrapped it around the ball once, 
and tied it to the frame - leaving a few extra inches for hanging during drying.
Then it's just random wrapping until you get the effect you like.
It took me about an hour to get to this stage.


Next, I used a small brush to cover the entire thing with an additional coat of stiffy,
and hung it from a ladder to dry - 
the dogs were trying to figure out exactly what was going on in the craft room!

 I waited 24 hours, but should have waited longer.
It had hardened further by the time we hung it.
Gently push the ball in all around to loosen the ball from the twine, then deflate gently.
I had to squeeze both my hands inside to cut the ball up before removing -
 it was too big to fit through the opening I had left!


Using the pendant light meant simply removing the wire from the top plate and feeding it through, them replacing the top plate and installing.. that whole process took about 10 minutes!


Remember the dining room before?


Here it is with our new light:


The large scale is perfectly dramatic,
and the texture plays really well off the new chairs - still waiting for cushions :)


now the whole space is bathed in the most wonderful patterns, especially at night...


All in all, a fairly simple DIY - although I had my doubts that it would harden sufficiently, it did!
The best tip I can give use is to be really generous with the fabric stiffener.
I'm completely happy with the results- and the price - it was $40.00 in total.
When we do replace this with a chandelier, 
it will definitely find it's way into another room of the house.

Hope these projects inspire a few of you - 
if they do, please send me some pics of your creations so I can share them on the blog!

til next time..


The Little Branch That Grew

Yesterday I went skulking for fallen branches in the forest so I could make these..

 I ended up finding a rather large branch.


Actually, I think it's more of a tree.

off to the store for yarn.
A LOT of yarn :)

til next time..


Tree Week: A Modern Version For Under $10!

It's tree week!
With the holiday decorating in full swing, I am obsessing a little over trees.

These are my favourite sort of trees at the moment.
Today I will be skulking (even the word sounds fun, really :)
around the woods behind my place to find some large branches...

Sparkle.


Color.


Simplified color. 
I sort of love this for Christmas.
Let's just skip the baubles..


Painted Branch.jpg


but I'd like something a bit more tactile,
 and voila-
the winner!


yarn branch art piece thing

little winter


There's nothing quite like wool knits for the winter - mittens, sweaters, throws, pillows
I'm a yarn junkie :)

Can't wait to get them made!
And a few of these to decorate the presents -
we made those last year as well.

022610dandelions01.jpg


Am working on the finishing bits for the chandelier today,
 so I will post pics of the branches and that shortly, hope you can stop by.

Just wanted to share a bit of good news and a HUGE thank you before I go -
 I won two giveaways on Monday :)

The first from Natalie at The Daily Imprint,
was for these adorable holiday decorations, 
generously gifted by the talented women of Polli:


Natalie is a Deputy Editor on Real Living Magazine, and it shows in her writing :)
She features fresh, insightful interviews with interesting creative minds frequently on her blog.
Stop by, you'll enjoy it.


The second giveaway, from the charming Jennifer at Rambling Renovators,
Will be heading down there this Sunday :)


Their blog follows Jennifer, husband and daughter Chloe (great name :)
as the super-talented couple renovate their home in Toronto.
There's heaps of great DIY and beautiful design - it's one of my favourite reads.

Thank you so much, ladies.
You made my week!

til next time..

Slinky Inky Blue Walls..The Quiet Room

Finally, we are in the last stages of the living room..
not that any room is ever really finished, is it?
Finished is an awfully strong word. One that leaves me feeling rather penned in.
Lets say we won't be needing anything changed for a while..
except for a wee bit of lighting!

This room was meant as a dining room, and we tried using it as such,
 but our two chocolate brown labs love to sneak up on the sofa, which means it's better off in this space.
Also, now our dining room is right off the eating area for the kitchen, 
which means the kids can have their own dinner party on weekends when we have friends in,
 while we get to visit in relative peace (and still see them flinging peas at their siblings :)

This chandelier is from the previous owners - don't hold it against me!
I have tried to unsuccessfully give it away to several people who need one, to no avail -
not that I'm really surprised..
Haven't found exactly the right light to replace it yet, but I'll show you when I do.

Here's the view from the front hall.


I have always scoffed at people who had formal living rooms, thinking they were wasted, roped-off spaces that simply gathered dust and admired themselves.
Now I have one! Almost twelve years of child-proofing has led me to want a grown up room.
ONE ROOM where it's always clean, and devoid of toys :)

A quiet place to read.


After we reclaimed this space as "adult", a funny thing happened - 
I started finding the kids in here. A lot.
There's no tv, radio, etc.
So what were they doing in here?

Reading, just like I was.


Perhaps there is something to that overstimulation theory :)
The darlings were craving peace and quiet just as much as we were.


The palette came from my vintage leather chairs, my favourite glamour girls, 
which were my first real furniture purchase so many years ago.. 
I considered changing them out for something more practical this spring, but couldn't :)
I bought these when I was still sleeping on a futon.. priorities!


The wall colour is Ralph Lauren's Urban Loft, a deep, inky navy that verges on black.
This room has western exposure, and I snapped these pics in the afternoon,
 so this is the brightest it gets - I love it! 
Don't be afraid to use dark / saturated hues in small spaces.. it enhances the ambiance.
Light tones often accentuate shadows, and highlight the dimensions of the room,
making it actually feel smaller.


You may recognize the bookshelf, I bought it at a garage sale this spring, 
it was previously in our bedroom
and I'd just like to say -  D, you are a prince for moving furniture all over the house, again and again :)
This room had been lacking a focal point. 
Since we aren't putting in a fireplace anytime soon, the bookshelf takes the place of the mantle,
 and provides storage for the heaps of books that are always finding their way in here.

A thrift store landscape and dollar store owl (he followed me home, really) 
live here with a carved wooden screen from a hazy vacation long ago..


Although I prefer quirky art, D. prefers the realism of naturalist Robert Bateman and the like.
This black bear print was an early investment piece for us, a compromise..
I surrounded it with some art cards I have been toting around for quite some time.
I'm sure you recognize these famous Japanese works.
Mounted on hand painted japanese paper, they have found a perfect home.


On the other wall is a couple of old frames from the Sally Ann, painted black and filled with some DIY fern art, more pics at the end of the post on that.
Another print, this one by Paul F Gauthier, who painted alongside the Group of Seven. 
Although his work did not achieve the same noteriety as theirs, I am drawn to it.
My father found this print for me, and so it will always have a special place in our home.


My charming little owl..


Paisley is my favourite motif, it runs through the house, popping up here and there..


Cameron and I have begun playing chess together regularly..
he is eight and I have to really watch him!
A natural strategist.. grinning as he claims my pieces, one by one.


There you have it, guys.. if there is still anyone reading after all that hope you enjoyed!

The fern art you saw is probably a placeholder until we find some other things,
 it was made really simply.
I wanted a botanical influence here, a hit of green with navy always works,
but something unique, a different way of presenting ferns.


I pressed some fern leaves between paper towels and left them under a stack of books to dry.
 Repainted the empty frames black, then rubbed to allow a little of the gold to show through.
Then I cut two pieces of foam board to fit the empty frames,
covered them with some navy linen (leftover from my curtains) which was secured on the back.
I coated them in spray adhesive, gently laid the frens on top, and let dry.
 A generous coat of Modge-Podge sealed the ferns.
I popped them into the frames and voila, art under $10!
I think I may trim them with some black velvet ribbon, just to add a layer,
 but I love the texture they add.


This room has some new, and some old, but it's all the things we love..
and in creating a quiet space for ourselves we spend more time being quiet, together.
It's funny how homes evolve to suit the needs of their occupants..
 sometimes needs you didn't even know you had :)

til next time..